Sorry for the English and all the pictures. This is my new project I wanted to share with you. Plans? Stock height for now at least with a single port 1776 and basic camping setup this year.
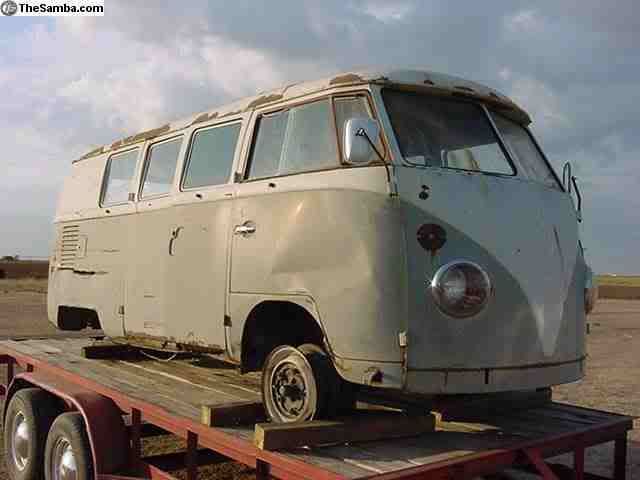
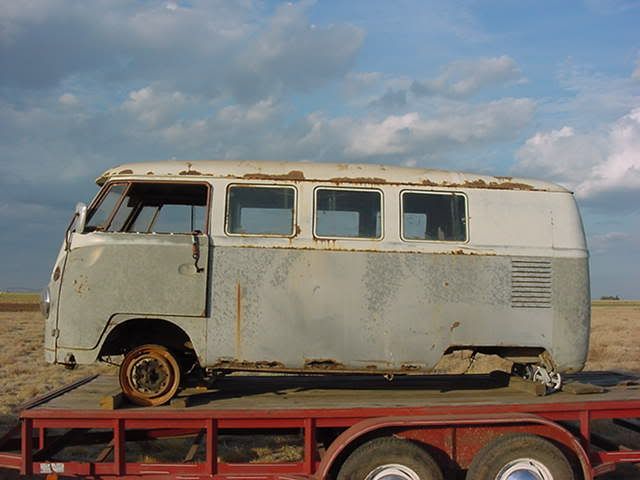
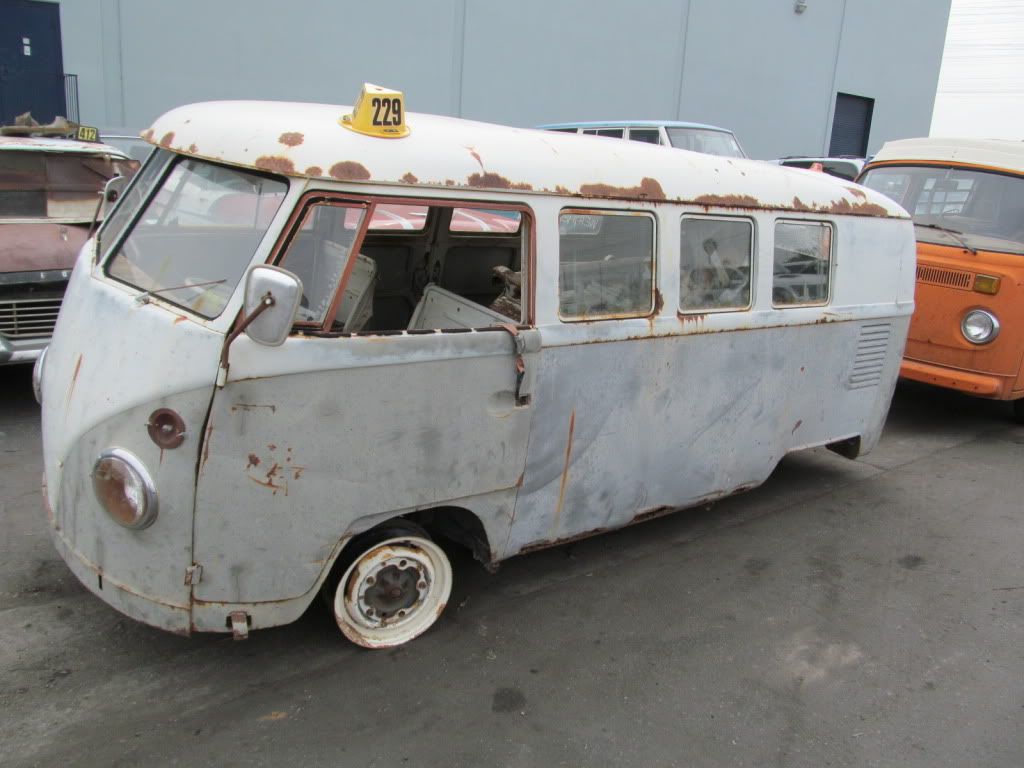
Here's the pics of where it was found and being transported to me. It sat in a junkyard called A1 Auto Salvage in Roswell, New Mexico from 1973 until 2011. I bought it from a guy who had it stored in Texas. 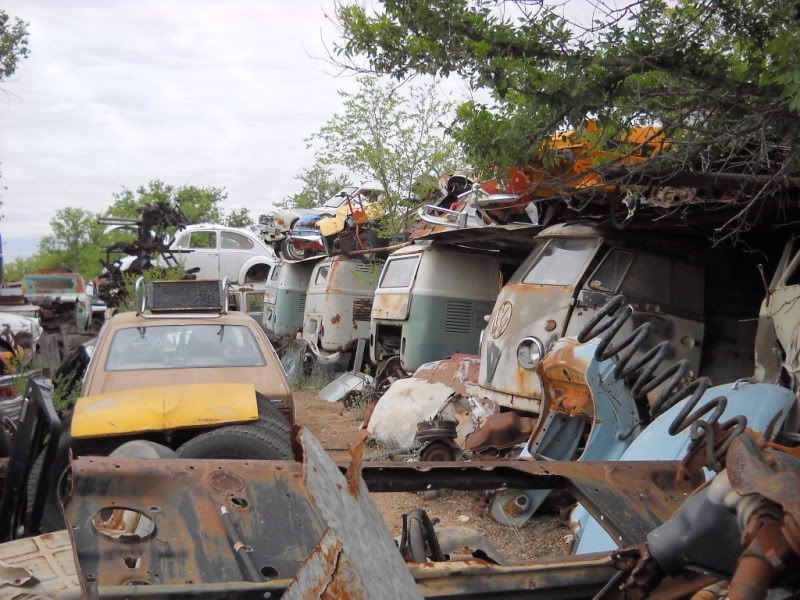
It's the one under the white beetle at the far end 
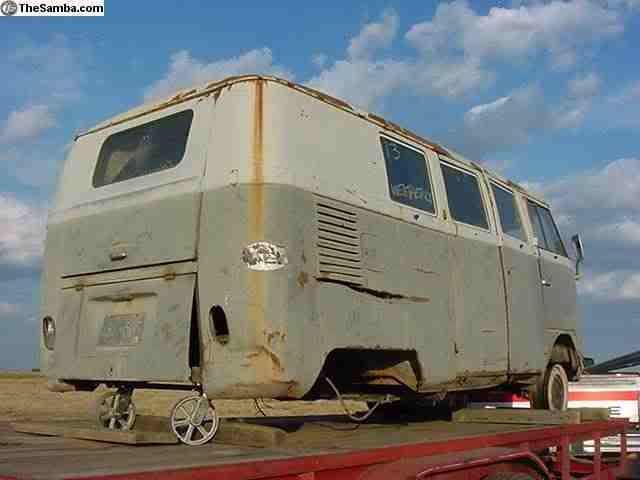
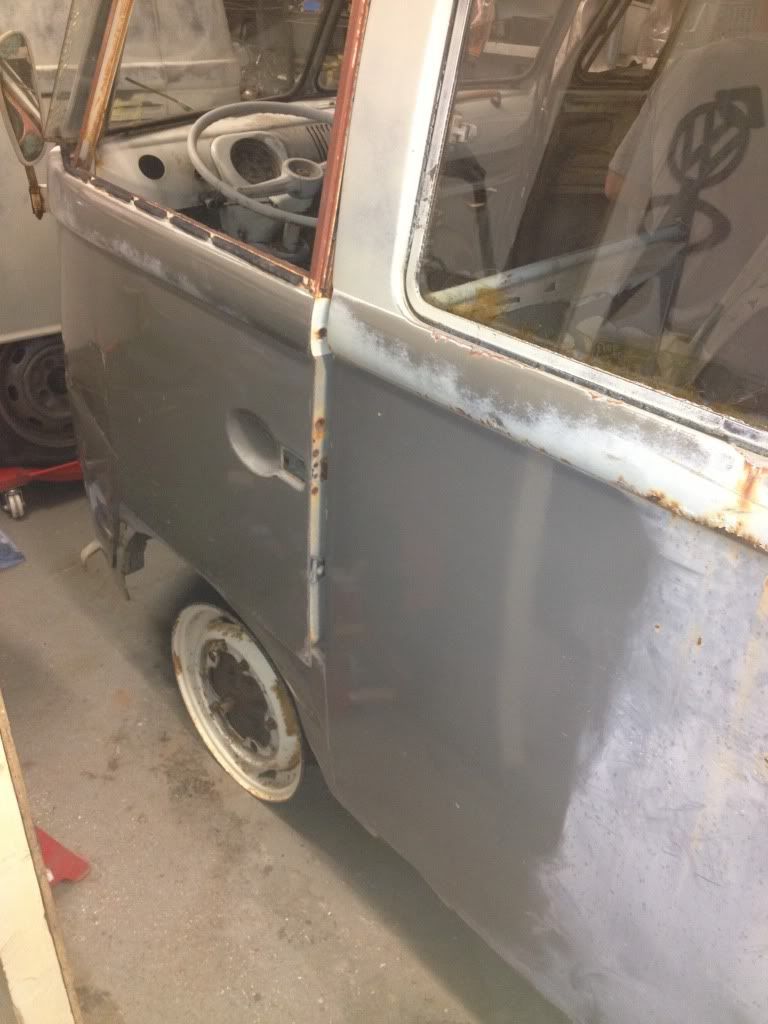
Some heinous creature savagely cut out the rear frame and driver side front frame. I have pieces to repair, this is the first main job. 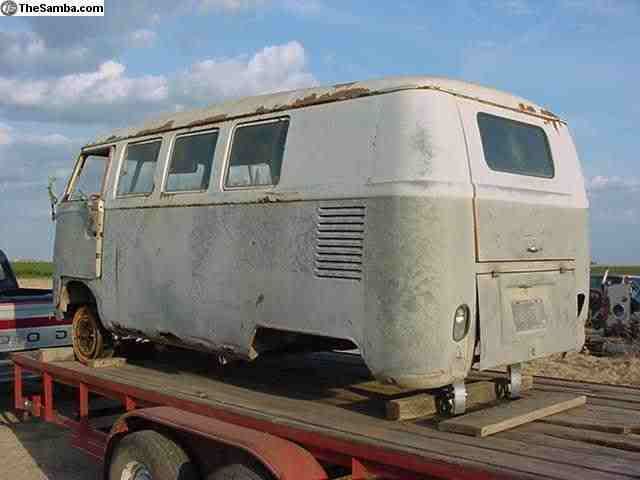
Took me a year to get it shipped home, mainly because I had no money last year. 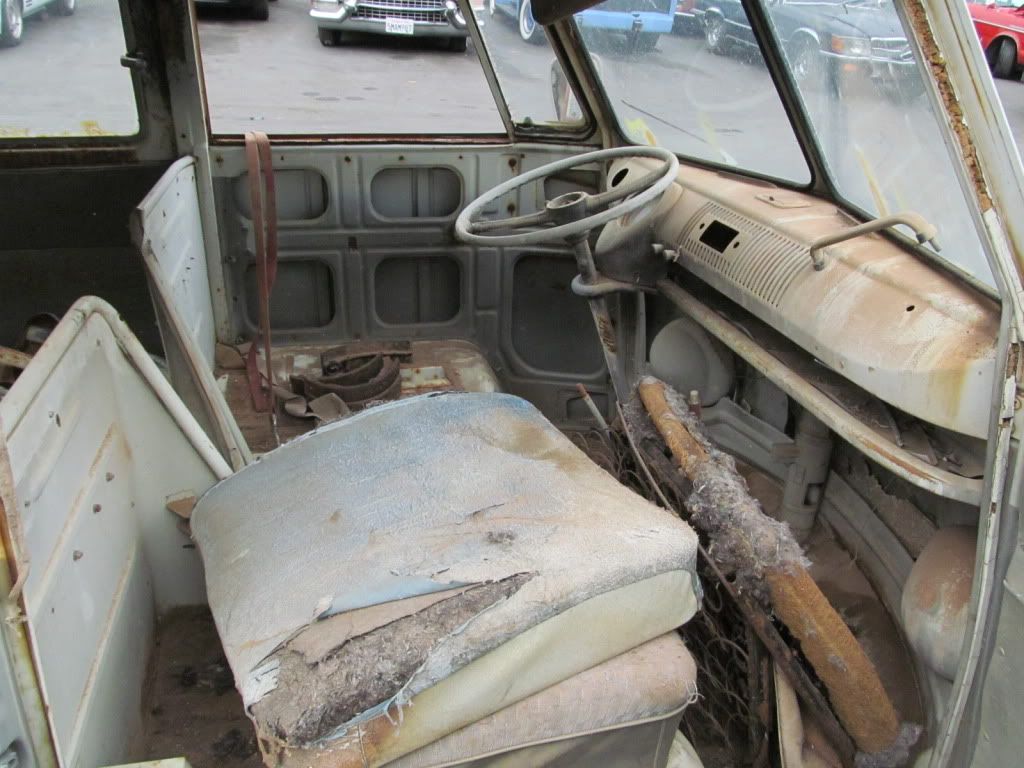
Expensive walkthru seats came with it. 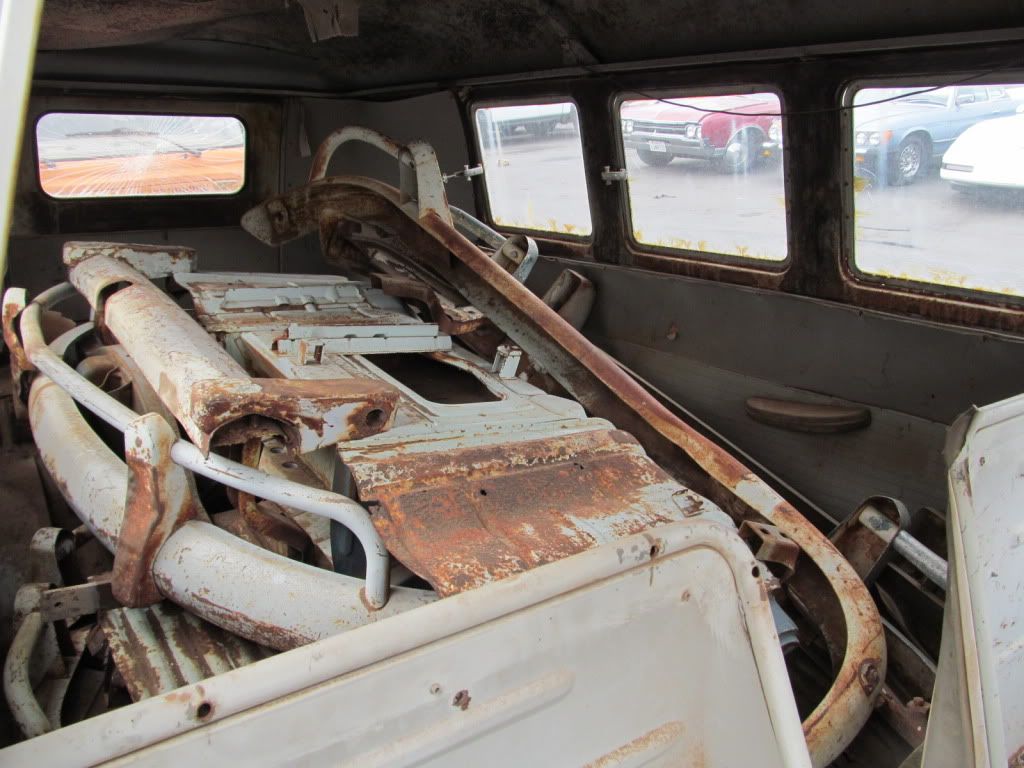
And a few more goodies, some to sell. 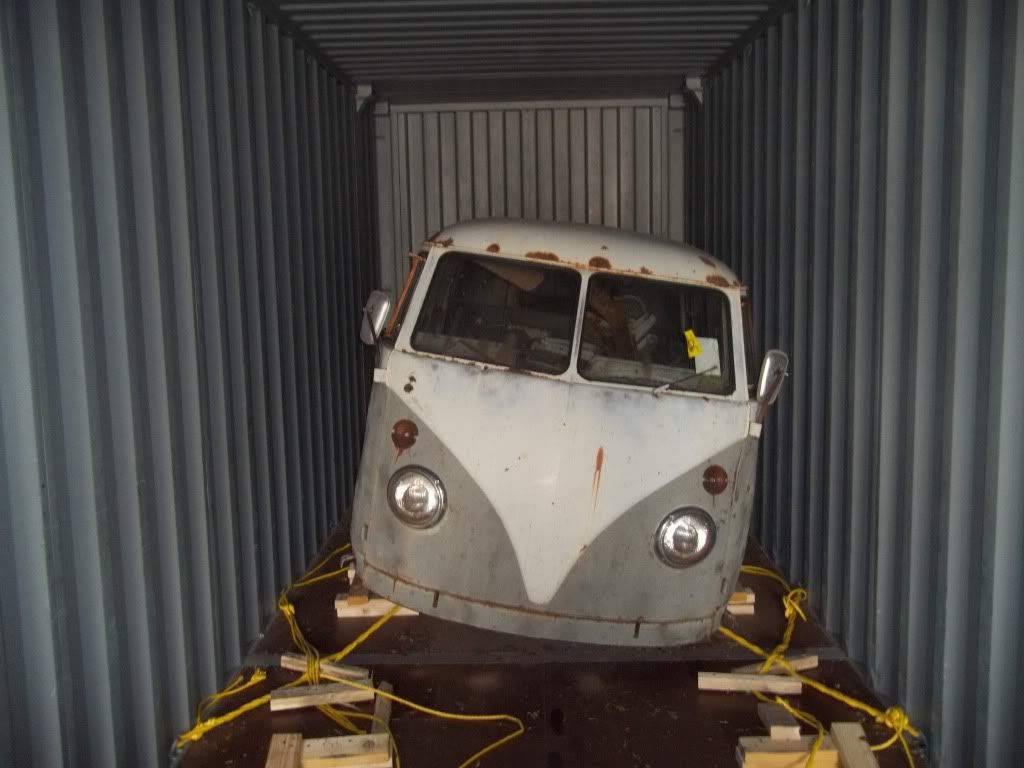
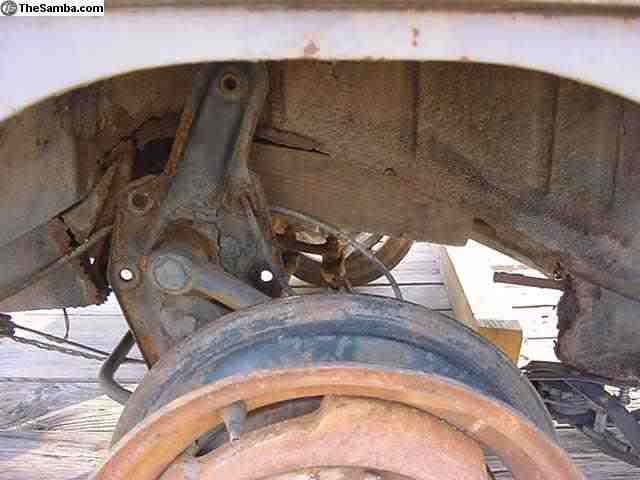
It fell over in the container when the wood blocks supporting the beam on the drivers side came out
Causing the shock tower to punch through under the drivers seat. 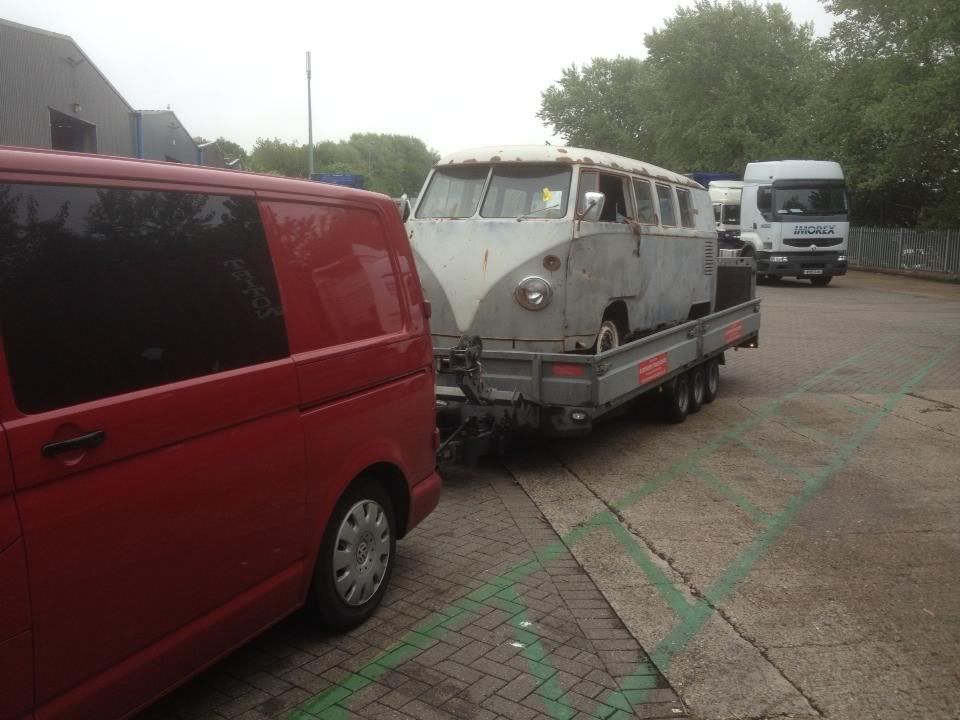
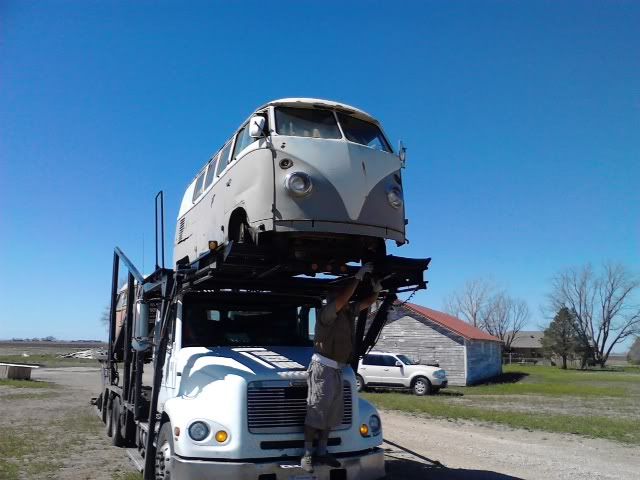
We got it loaded with careful use of a fork truck. 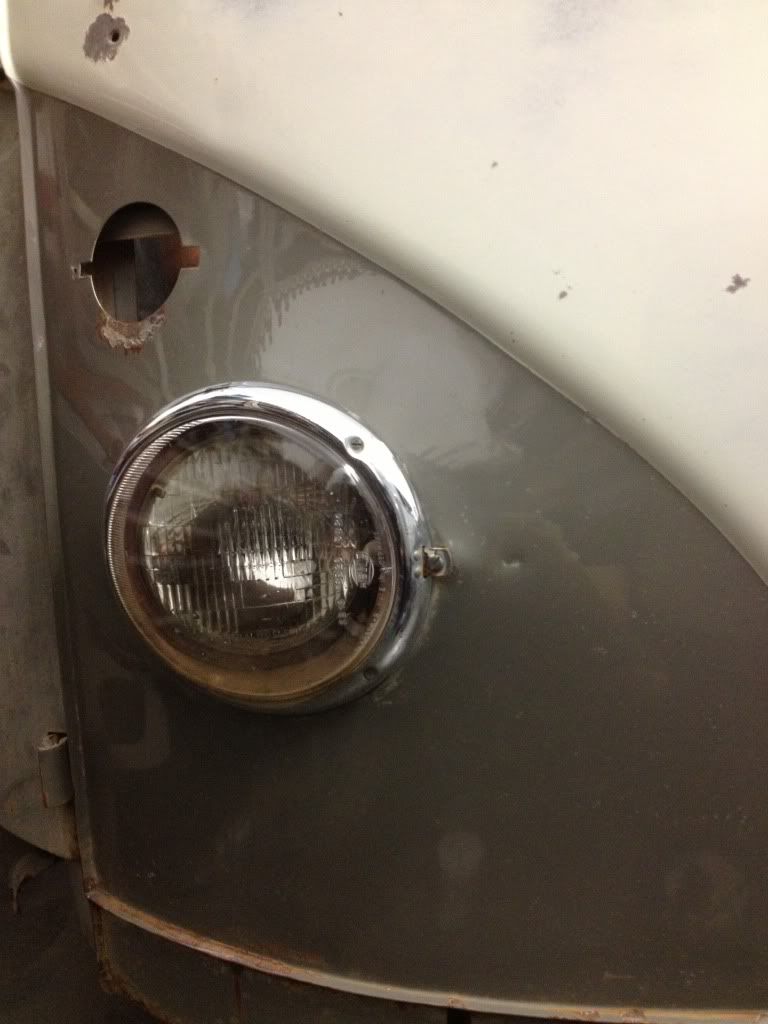
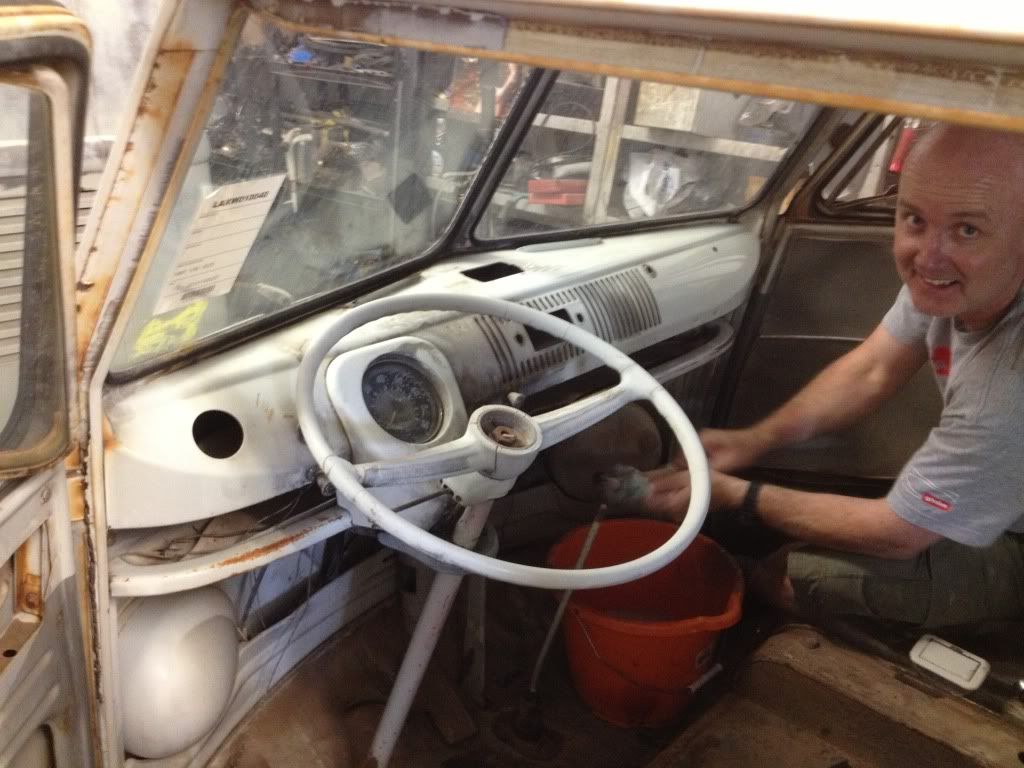
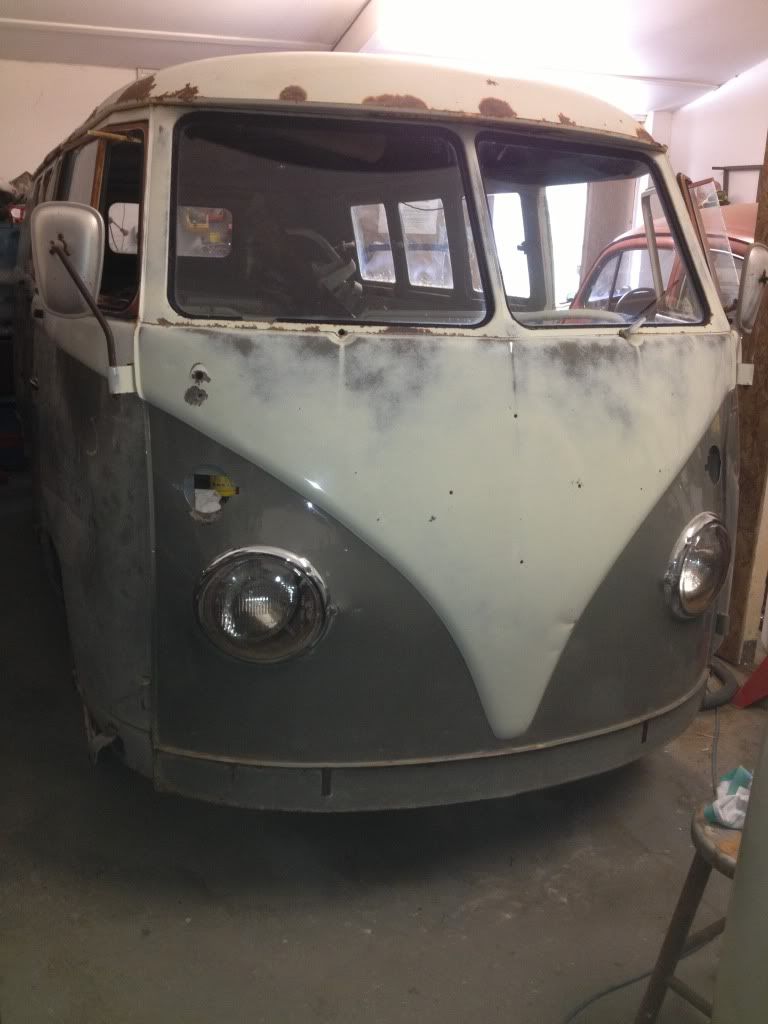
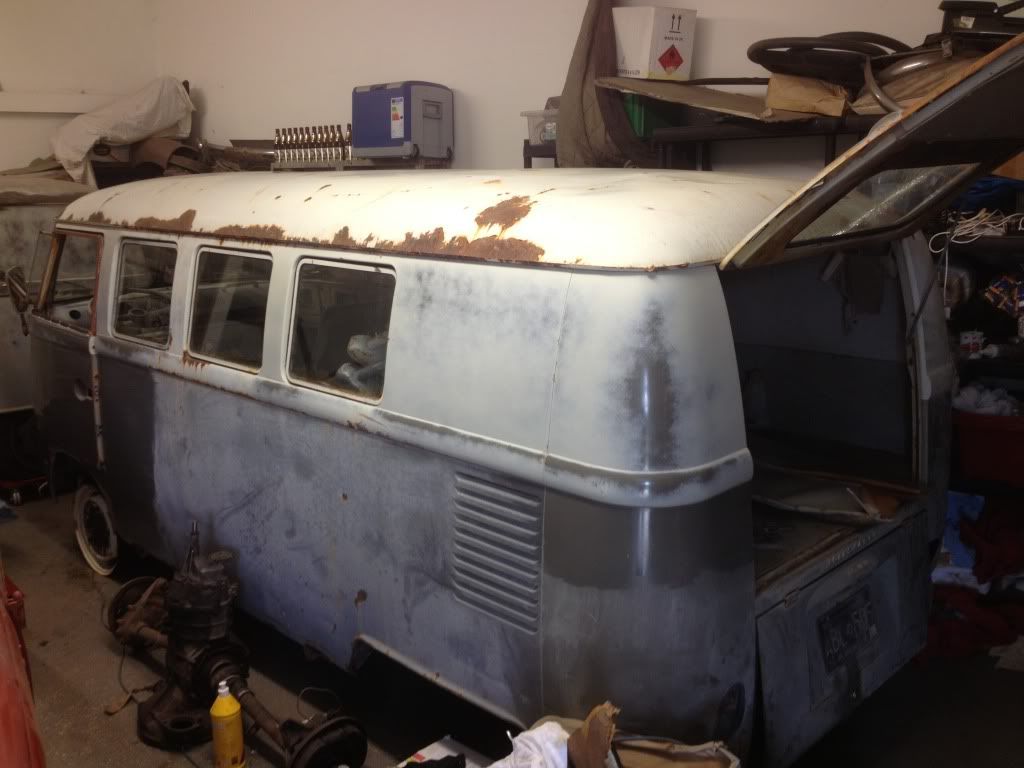
And into the shop where the first job was some cleaning, paint buffing and banging out some dents.
More progress very soon!

- pompejus
- *Boxerville Supporter*
- Offline
Nice project,will follow this..  Welcome!
late,
in love,
and a little drunk..

http://boxerville.se/forum/viewtopic.php?id=2062 typ2 bay -73 RHD camping "Bay-Be Blue" bussen byggs i version 1..
http://boxerville.se/forum/viewtopic.ph … 73#p204073 latebayEh wannabesplit Dh.vilande tråd
http://boxerville.se/forum/viewtopic.php?id=2058 typ1 oval-56 "Maximiliam" vilande tråd.:-(
Thanks. Should this be in the projects section, or is it ok here?
Its ok here. Nice bus you have...where are you from?
UK - south coast.
Time for some updates............
Been busy on the bus for the last 2 weeks. got the chassis repairs all done and painted, beam painted and back in with new center pin. Spindles rebuilt with new bushes and refitted tomorrow. Battery tray removed and will need a new rear pillar, which should be here tomorrow. Here's some pics, more soon. Planning to have the bus on the road for my holiday 2nd August and SPA bus show...


- Jacob
- Enthusiastic
- Offline
Great job! You're working really fast. Keep it up! I'm looking forward to see som pics on the road in august!
Been a busy week..
Got the spindles fitted, rear chassis painted, spring plates painted, indexed at 20 degrees and fitted with new rubber donuts and plenty of rubber grease, e-brake, accelerator, clutch and heater cable conduits all needed extending and sleeving, where they had been cut off. Gearbox fitted with new nose cone, cleaned up and fitted. New shift rods, couplers and bushes all the way to front, gear lever base painted and new gaiter fitted, assembled with new grease. Shifts gears, but still needs some adjustment (new brazillian shift rods) New tie rod ends, backplates for front and all drums wire wheeled and painted.
All brakes at wheel ends assembled. Steering box drop arm had been cut in the junkyard, every puller I tried even with heat would not take it off, so I had to remove the steering box and grind carefully through the arm. Some water came out of the column, so I stripped the box. The cover was corroded and came off in pieces.. I had a spare though and the rest of the box was in very good shape, even the output shaft bushes are nice and tight, so I reassembled it, fitted a good drop arm and filled it with penrite heavy oil steering box lube. Then refitted to the bus and a new drag link fitted. Steering is great! Fitted good used front shocks and new rear ones.
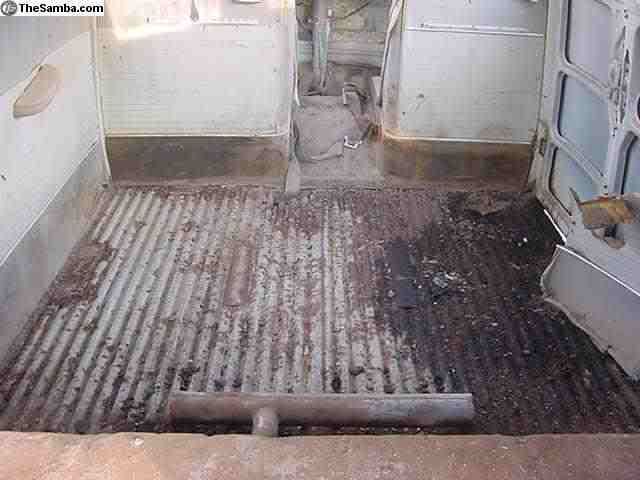
Fitted the powder coated 15" bus rims with 195R15C tyres and put it on the ground. I was pretty happy at this point! Turned it around after tidying a weeks worth of mess and my wife started to remove the rear interior panels and scrape all the dust and dirt from the rear floor. It is good except for right at the front, where it is dented and rusty - I think the junkyard stored batteries in here, which leaked acid.
Finally yesterday I fitted a new brake clevis and pushrod, which seemed longer than any I have seen before, so I had to shorten the pushrod and use a spacer to fit the bay servo master cylinder. I started to make the brake pipes, but my flaring tool broke, so I need to get a new one. I took apart the rear hatch handle and cleaned and greased it, so now the key works. Then fitted a new rear windscreen with new rubber, as the old one was cracked.
Here's the pics


Nice progress on your renovation
http://boxerville.se/forum/viewtopic.php?id=2062 typ2 bay -73 RHD camping "Bay-Be Blue" bussen byggs i version 1..
http://boxerville.se/forum/viewtopic.ph … 73#p204073 latebayEh wannabesplit Dh.vilande tråd
http://boxerville.se/forum/viewtopic.php?id=2058 typ1 oval-56 "Maximiliam" vilande tråd.:-(
Thanks, I have been pretty focused for the last 3 weeks 
My wife told me this morning it is 4 weeks til we set off on our 4 week trip, I thought there was only 3 weeks left, so feel a little better \:D/
A guy I know who is an old school panel beater came over today with his port a power. I know a fair bit about metal but didn't want to mess it up. Basically the whole pass. Side was pushed in by 1/2" and the cargo doors, pass. Door and rear hatch wouldn't close properly. There were also some pretty good size dents in the roof, from where the '65 bug was sitting ](*,)
Well, about an hours work and everything lines up and closes right \:D/ \:D/
Now I can chop off the damaged short side panel and do the rockers and cargo floor repair. The goal is metal repair done by end of Saturday. We'll see!
Pics or it didn't happen, right?


Going out for dinner with my in laws now \:D/ ](*,)
More tomorrow.
Today's progress.
Removed knackered side panel and cargo rocker. Getting all the remains of the side panel off was a total hooker. Never changed one before. Then straightened out the corner and the inner supports, which had taken a bit of a beating. Trial fitted side panel, fits good. Also threw a front bumper on. Not sure whether to go euro blades or overrider.
Pics:


- nizekustoms
- *Boxerville Supporter*
- Offline
I´ve missed this thread! Nice project and nice skills! OG paint rocks...

- JanneT3
- Enthusiastic
- Offline
Amazing work 
Janne Lindgren Åmål/Oslo
Bay med dubbla sidodörrar och automat -77

- Hans vW
- *Boxerville Supporter*
- Offline
Wow, amazing fast work.. and I really like the colour combo...
Thanks again for the replies. It helps.
Nothing was straight forward this week, did a lot of hours of unseen grunt work though. Side panel and cargo sill all done, bulkhead repairs part way through.
I painted the door shut area before re hanging the door. Great match to the filler flap. Started plumbing the brakes after my old flaring tool broke and waited for another. Well it was junk, did six flares before breaking last night, so I did some work on the steering wheel instead.
Pics:

Only complaint on Autocraft side panel - had to swap nut plate over for filler flap

Lots of work here, can't wait to get this part behind me...
Rocker on and side panel. Welded side panel around edges and used a structural adhesive on the inner structure. 
Buffed the cargo doors and straightened the door a little and front dogleg. Starting to look a little better.
Had to do something about my bug today, as struggling to shift gears and I sold my modern vw transporter yesterday, so this will be my daily for a while. 
No updates, been getting a bit crazy last 2 weeks, long days and not enough time off. All welding is done as of today, including rear seat belt mounts. Brakes plumbed ready to bleed, insulation going in, Simon came over and repaired the fucked up wiring loom and he's coming back Monday to get everything working. Motor assembled ready to go in - 1776 sp with stock exhaust and rebuilt 30 pict 1 carb, rebuilt German fuel pump and distributor. Fuel tank sealed with POR-15 kit and fitted. Windshield surround wire wheeled, treated and paint blended, just waiting for a new pass side windshield, as had a stone chip and cracked on removal. Wiper linkage all fitted, brakes adjusted and a load more other jobs done. MOT inspection booked for Wednesday, a week before we are planning to leave for the 4 week trip. Started modifying Westfalia bed brackets to make a full width bed and cut all wood to shape too. Made a rear facing seat to accommodate toilet and storage, my wife made curtains and covered front seats. Now the welding is finally done I can clean it out and start putting clean stuff inside.
Pics:


Drove it to the gas station tonight. Six mile round trip. First drive in forty years \:D/ 


Took it for the MOT inspection this morning and it passed with no advisories 
Now it's time for some paint, bumpers and a camping setup before I leave for holiday, hopefully before next weekend \:D/

- Michos Miche
- Pro Writer
- Offline
Nice work, and a nice in Swedish terms "rust free" project. Congratulations!
Friskt jobbat och ett snyggt resultat! Men om strömfördelaren och förgasaren som visas används blir det inte rätt funktion på vakuumregulatorn!
Nice work, and a nice in Swedish terms "rust free" project. Congratulations!
X2

- Sten vW
- *Boxerville Supporter*
- Offline
Brilliant, and on time as far as i can tell!
SvW
Thanks for the replies, I think it will be seven weeks on Tuesday since I started. I have built a fair few buses in the last ten years, but nothing quite this bad with the frame pieces missing and the side and roof being pushed in.
The last bus I intended to be a keeper was an original paint sea blue '66 walkthru, it was a dream project compared to this one, but caught fire 2 weeks after I got it on the road and was a total loss. It's taken me three years to afford and build a bus I truly intend to hold on to. I have araldited all the brass fuel fittings (cause of the fire last time) and have an automatic fire extinguisher to fit in the engine bay. With a lot of my buses I worried about fine details, like matching glass and everything being correct before getting them on the road, then got bored having nothing to drive and sold/traded for a driver.
This bus was built right where it matters to be a reliable driver, but everything else is 'good enough' as it can always be changed for better down the line - the bus came with sigla glass all round, but I have replaced the rear screen and one pop out glass with sekurit, as they were there and suited my budget. The pass. Windshield is a brand new laminated one.
I owe a lot to my lovely mum and pop, who camped out for over a week and helped me a lot - my mum ran errands whilst I was still welding and then fitted all the insulation in the bus - another first for me, always wanted to do it. Whilst pops spent 10 days straight in the shop with me every day sealing the fuel tank, building up the engine from a long block, disassembling and cleaning a load of stuff and loads more. I really couldn't have achieved my goal without them.
Here's some pics of the insulation - self adhesive barrier mat on the sides, inside doors, etc, heavy non adhesive mat on bulkhead and floors and 15mm self adhesive foam on the roof to allow for a headliner later. 


